Graduation Progress Set-Up
PowerSchool Graduation Progress Set-Up
PowerSchool has two powerful tools for Guidance Personnel to track students in high school – Graduation Progress and Graduation Planner. The Graduation Planner is complex and requires extensive setup and has it's own 55-page manual you can download at PowerSource. It will require some ticketing because there are district items that require completion.
This article is for the Graduation Progress.
There are several steps required before you can use Graduation Progress at your school:
- Create one, or more, graduation sets that define requirements for graduation from your school. You need more than one if you have multiple tracks at your school. If there is only one set of requirements, you only need one set.
- Edit the requirements for your graduation set(s). Here's where you define the requirements for each area of study for a student.
- Decide if you want the courses to come from anywhere there is a credit type that matches the area or if you want to choose specific courses. Specific course can cause some issues with students who transfer into your school.
- Assign the appropriate graduation set to each student in school.
- Spot check a few student to verify the Graduation Progress page is generating the information you need.
Create Graduation Sets
- Start Page > School Management > Postsecondary Plans > Graduation Sets
- Click New
- Give the Set an appropriate name. Submit.
Edit Requirements

- Start Page > School Management > Postsecondary Plans > Graduation Sets
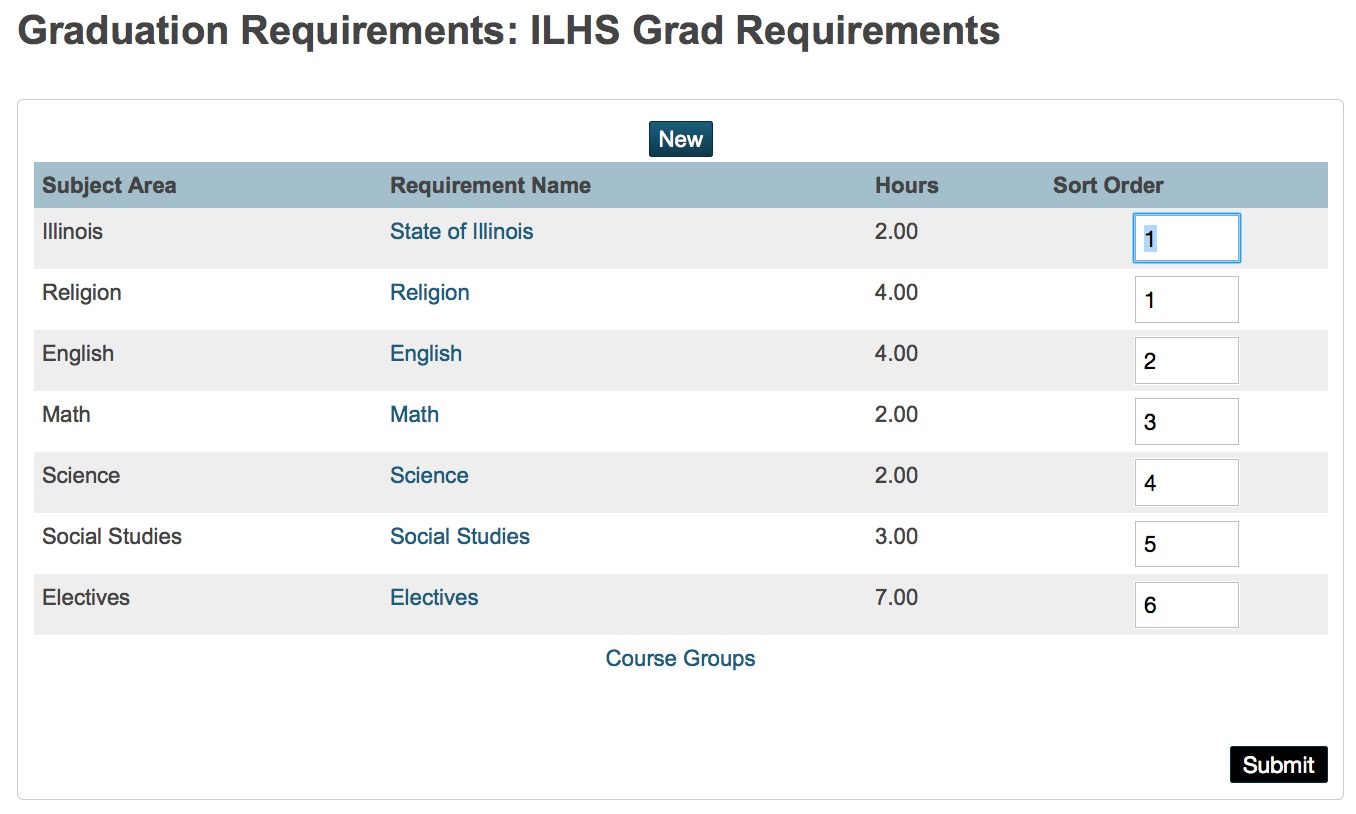
- Click Edit Requirements for the set you want to edit. When you are finished, the list will look similar to the image above. You can update requirements at any time by clicking the appropriate link.
- Click New.
Edit Fields

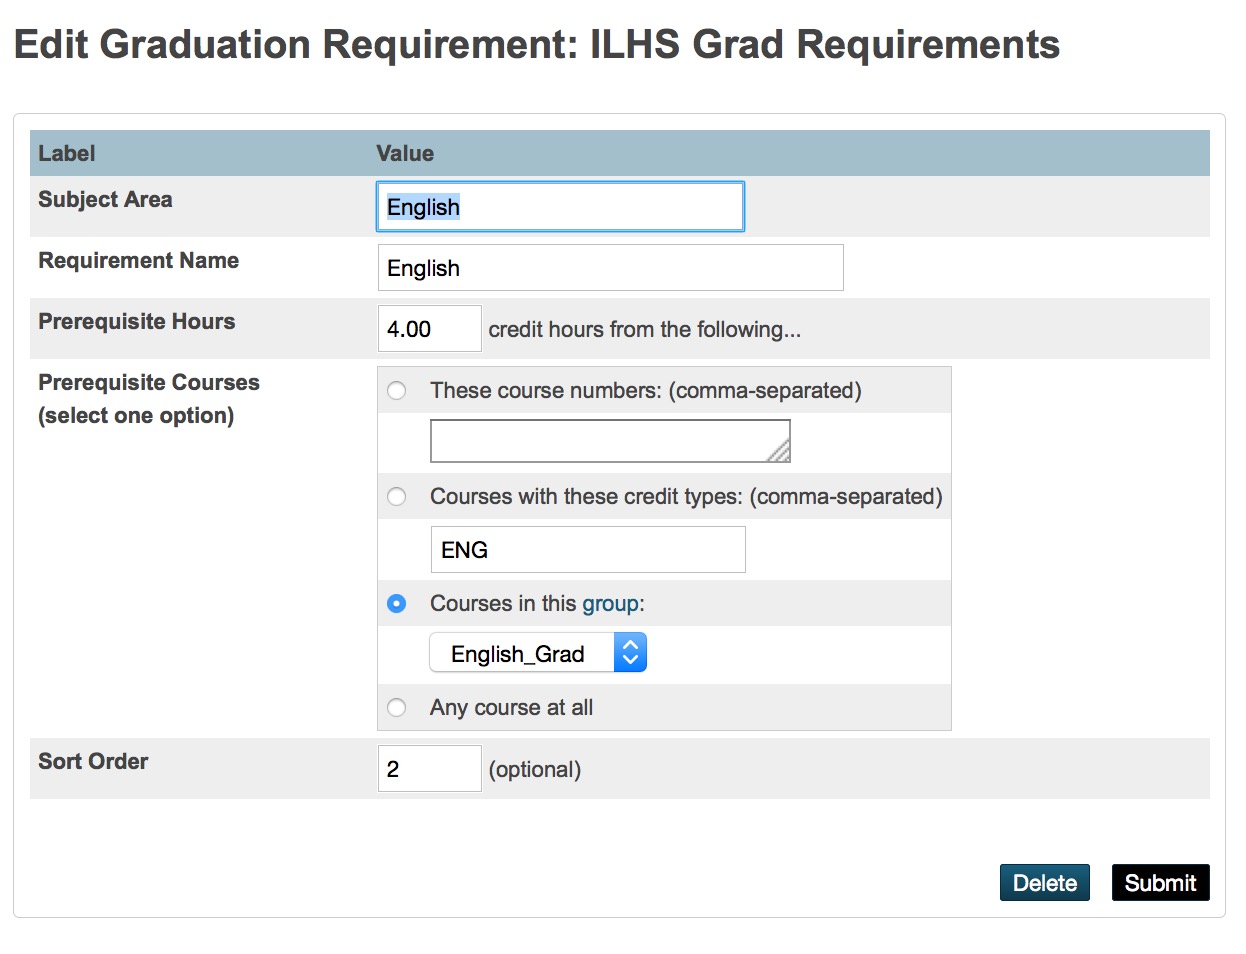
Enter the appropriate Subject Area and Requirement names.
Prerequisite hours are the number of credits required for graduation in that area
Prerequisite courses have some options:
- Specific Courses you enter. (Good for one or two but more than that is inefficient)
- Credit Types uses the prefixes for the course numbers as set up in courses or entered in historical grades. At most high schools this is the easiest choice. You may see extra courses with no credits if your feeder elementary schools use PowerSchool.
- Courses in this Group allows you define a large number of specific courses to satisfy requirements. (See Below)
Sort Order is the order in which the courses are assigned to the requirement. The lowest number should be the most critical requirement. The highest value in the sort order should be Electives.
Create Course Groups (optional)

- Start Page > School Management > Courses and Programs > Course Groups
- Click New
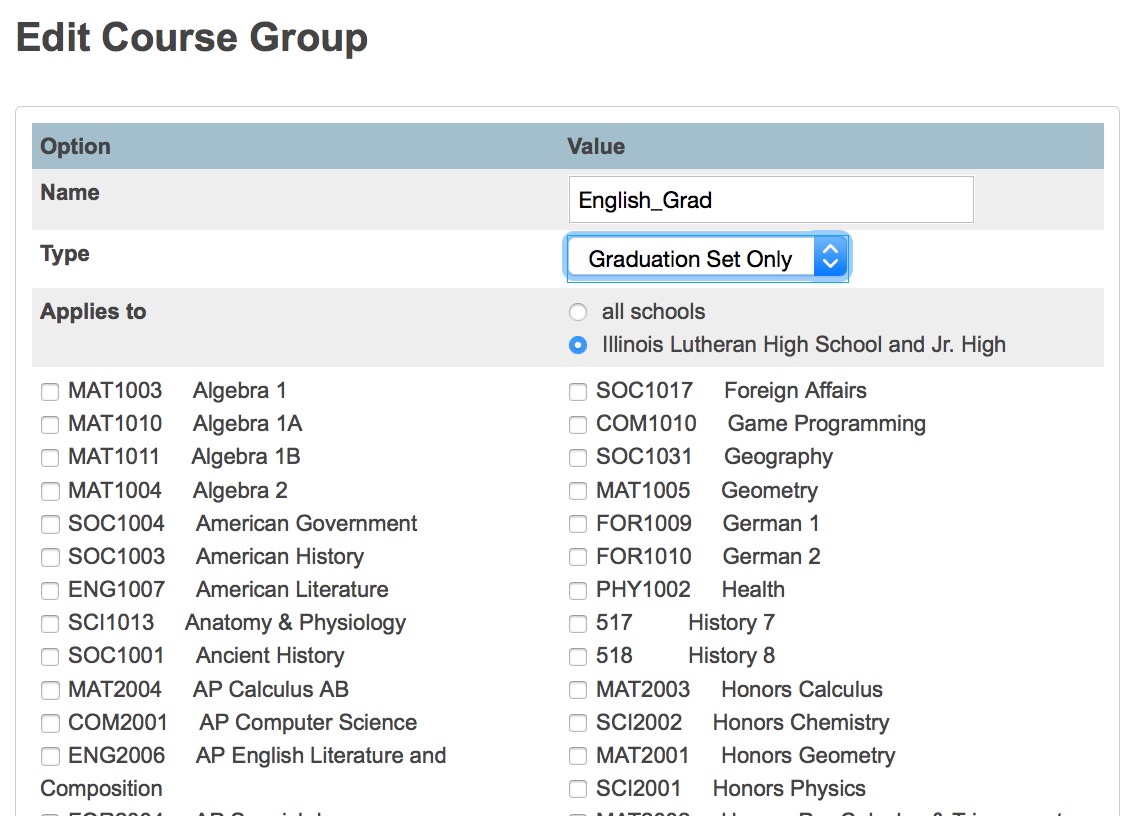
- Give an appropriate name (e.g. English_Grad)
- Select Graduation Set Only from the Type drop menu.
- Applies to local school only – no one else wants your course groups and you don't want someone from another school editing the graduation set you create.
- Check off all the courses that apply to the requirement
- Submit
The last Group you create should be electives and that should include all the courses in the school. Any class can then become an elective once the requirements for that subject area are met. For example, once all of the English requirements are met, any additional English class will become an elective to fill that requirement.
Remember to update the Group(s) any time you add a new course to the catalog.
Assign Graduation Set to Student
- Select the student.
- Navigate to Student Profile > Modify Info in the left menu
- Select the appropriate Graduation Set from the drop menu. If you have many students to edit, enter a support ticket. The mass entry will either be done for you or, in the case of multiple Graduation Sets, you will get instructions how to do this using the Student Field Value group function.